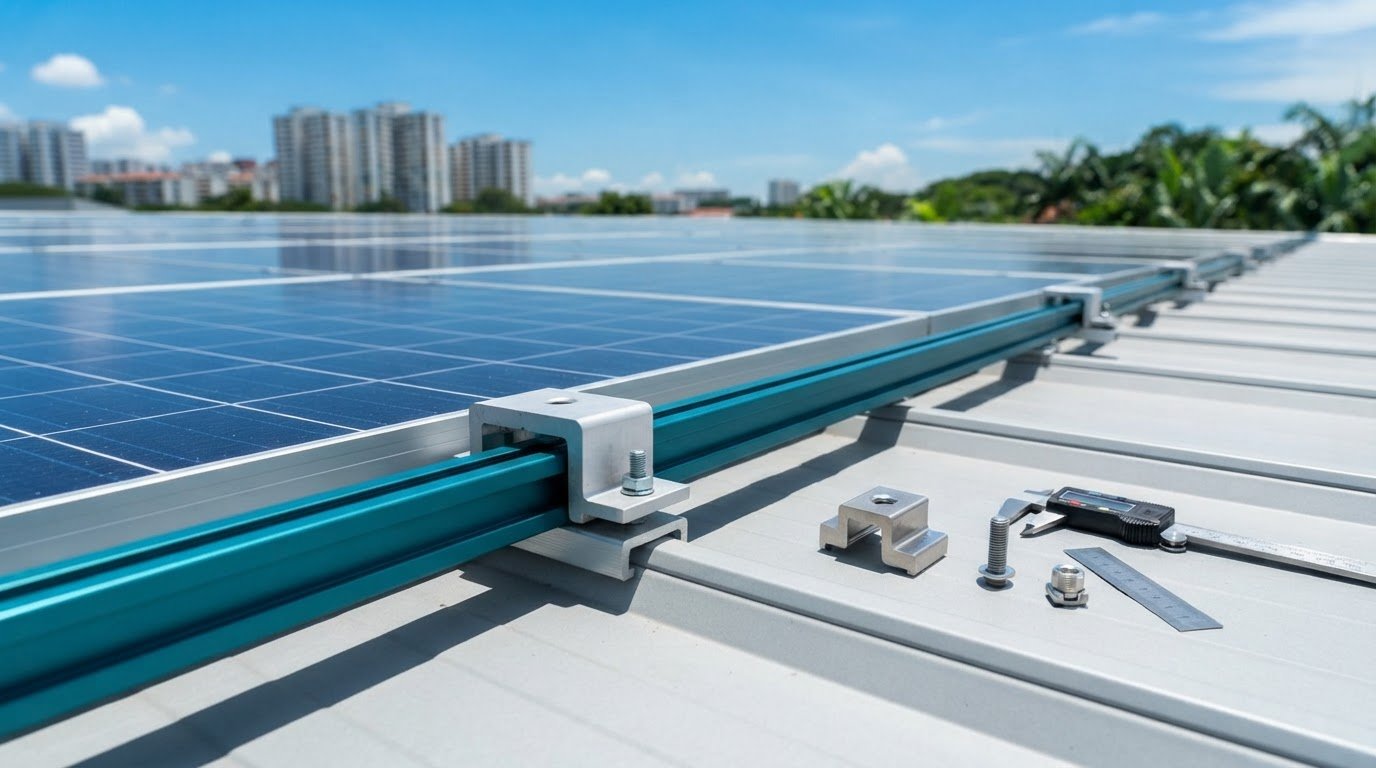
What if a clamp that fits the project drawing doesn’t match the seam installed on the roof? Selecting standing seamlock roof clamps starts with verifying the actual roof profile, not relying on a general product description. The clamp connects the seam to the mounting design, so a mismatch can prevent the selected rail and module hardware from fitting together as intended.
For a useful compatibility check, gather the roof profile information, clamp documentation, and details of the proposed mounting assembly. Compare the seam shape and dimensions with the clamp’s stated compatible profiles, then check how the clamp connects to the rail and module mounting hardware. This guide explains how to review those details, compare clamp options, and prepare a project enquiry. It also outlines product details to request, including material, dimensions, finish, compatible seam profiles, load ratings, and supporting test evidence. SM Solar is a wholesale distributor of solar products, including roof clamp accessories. Share the relevant roof, rail, and project documentation when enquiring about product details.
Key Takeaways
- Document the installed seam profile before comparing clamp options. Use roof drawings, manufacturer records, or clear site photographs where available.
- Check standing seamlock roof clamps against the documented roof profile and the intended rail and module mounting interfaces.
- Compare options using technical documents. Mark unsupported details for supplier confirmation instead of assuming compatibility.
- Prepare roof, rail, module, and project records for review, and distinguish confirmed project inputs from details that still need confirmation.
- SM Solar distributes solar products wholesale, including roof clamp accessories. Provide project documentation with a product enquiry, without assuming stock or compatibility.
Role of Standing Seamlock Roof Clamps in Solar Mounting
A roof clamp connects a compatible standing seam to the solar mounting assembly. It provides a connection point for the components above the roof, but suitability depends on the installed seam profile and the project requirements. The category name alone doesn’t establish that a clamp will fit the roof or work with the selected mounting system.
Start with the roof profile. Standing-seam roofs have raised seams, but their shapes and dimensions can vary. The Standing-seam metal roof overview provides general construction context. Clamp selection still requires documentation for the actual roof and clamp under consideration.
Where the roof clamp sits in the mounting assembly
Review the connection in sequence: roof seam, clamp, rail or other mounting interface, then module mounting hardware and the module. Each component has a distinct function:
- Roof clamp: connects to a roof seam that the clamp documentation identifies as compatible.
- Rail or mounting interface: connects the clamp to the arrangement used to support the modules.
- Module mounting hardware: secures the modules to the mounting assembly according to the system design.
These parts aren’t interchangeable. A clamp that appears to suit the roof may not have a verified interface with the intended rail. Review the assembly as a connected system using relevant component documents and project design information. Confirm fit and interface details before procurement instead of selecting each part independently.
What “standing seamlock” means for fitment
“Standing seamlock” describes a roof-profile category. It doesn’t confirm compatibility with every clamp sold under a similar description. Compare the installed seam with the clamp manufacturer’s documented compatible profiles. Where available, use roof manufacturer records alongside clear site photographs or drawings to identify the profile. A cross-section can help with comparison, but only if its shape and dimensions are verified against the roof documentation.
For standing seamlock roof clamps, request confirmation of profile fit and the connection to the selected mounting hardware. Keep unverified details open for review. The key checks are the clamp’s documented seam compatibility, its mounting interface, and any project documentation needed to assess the proposed assembly. This creates a traceable basis for selection without assuming that a shared product label proves a suitable fit.
How to Verify Roof Profile and Clamp Compatibility
Use a documented sequence before selecting standing seamlock roof clamps: record the roof, identify the installed seam, compare it with clamp documentation, and confirm the full mounting assembly. A product label or visual resemblance isn’t enough to establish fit. Compatibility should be supported by information that relates to the actual roof profile and the proposed mounting configuration.
Identify and document the installed seam profile
Start with the roof-system manufacturer and profile designation, if known. Gather roof drawings and manufacturer documentation, then add clear site photographs that show the seam from useful angles. Photographs can help identify features, but similar-looking profiles may differ. If records are missing or the profile remains uncertain, ask the roofing contractor or project engineer to confirm the installed seam before treating a clamp as suitable.
Match the seam to clamp documentation
Compare the identified roof profile with supplier or manufacturer documentation for the specific clamp under review. Check that the stated profile and clamp interface correspond to the project. Don’t rely on a broad description such as “metal roof” or “standing seam.” If the documentation doesn’t explicitly cover the profile, dimensions, or proposed configuration, record the gap and request written clarification.
Keep the verification in four steps:
- Document the roof: Gather drawings, manufacturer records, profile information, and clear site photographs where available.
- Identify the seam: Confirm the roof manufacturer and profile designation. Flag uncertain identification for project-team review.
- Check the clamp evidence: Match the exact seam profile against current clamp documentation. Treat undocumented dimensions, compatible-profile claims, and load ratings as details to confirm.
- Review the assembly: Confirm how the clamp interfaces with the selected rail and module mounting hardware. Assess the project configuration as a complete system, not as separate parts.
Fitment confirmation is only one part of the technical review. Ask what documentation supports the proposed use, including applicable load information and test evidence where the project requires it. Don’t infer performance from appearance, material, or a general product description. If the available records don’t address the exact roof and mounting arrangement, keep the selection provisional until the supplier or responsible project professional clarifies the details.
For a project-specific product enquiry, provide the roof, rail, and project documents to SM Solar’s solar hardware supply team for product-detail review. Confirm profile fit, mounting interfaces, and any outstanding documentation before ordering.
Compare Clamp Options by Fit, Documentation, and Installation Method
Compare candidates against the same project requirements. Clamps that look similar aren’t necessarily equivalent: their documented seam fit, mounting interfaces, and installation requirements may differ. Use the matrix below to record evidence for each candidate. It’s a comparison framework, not a ranking of specific products.
| Comparison field | Clamp option A | Clamp option B |
|---|---|---|
| Roof-profile fit | Record the profile named in current documentation. If it doesn’t explicitly match the project roof, mark “confirm with supplier.” | Record the profile named in current documentation. If it doesn’t explicitly match the project roof, mark “confirm with supplier.” |
| Clamp interface | Note the documented connection to the seam and the interface to the mounting system. | Note the documented connection to the seam and the interface to the mounting system. |
| Rail and module hardware | Record whether the proposed rail and module mounting hardware are addressed in the documentation. | Record whether the proposed rail and module mounting hardware are addressed in the documentation. |
| Material and finish | Enter verified details from the relevant product documents, or “confirm with supplier.” | Enter verified details from the relevant product documents, or “confirm with supplier.” |
| Performance evidence | List available load ratings and supporting test or project documents. Don’t infer missing values. | List available load ratings and supporting test or project documents. Don’t infer missing values. |
| Installation requirements | Record documented tools, assembly steps, and any specified installation conditions. | Record documented tools, assembly steps, and any specified installation conditions. |
Compare documented compatibility, not appearance alone. Check that the stated seam profile matches the roof records and that product documents identify the clamp interface and connected mounting components. If a profile description is broad, ambiguous, or missing, mark the item unresolved. A visual resemblance or general category label isn’t proof of fit.
Keep verified specifications separate from assumptions. For each candidate, record the source document and revision where available, then flag missing information for supplier confirmation. Material, finish, dimensions, load ratings, test evidence, and compatibility statements need current supporting documentation. Don’t claim corrosion resistance, certification, or load capacity unless the specific evidence supports it.
Installation method is another comparison point. Follow the instructions supplied for the exact clamp and proposed assembly; don’t assume procedures transfer between options. If documentation doesn’t address project loads, environmental exposure, or the full mounting configuration, refer the unresolved issue to the supplier and project engineer. Identify a preferred option only after the project team has reviewed equivalent, project-relevant evidence for each candidate.
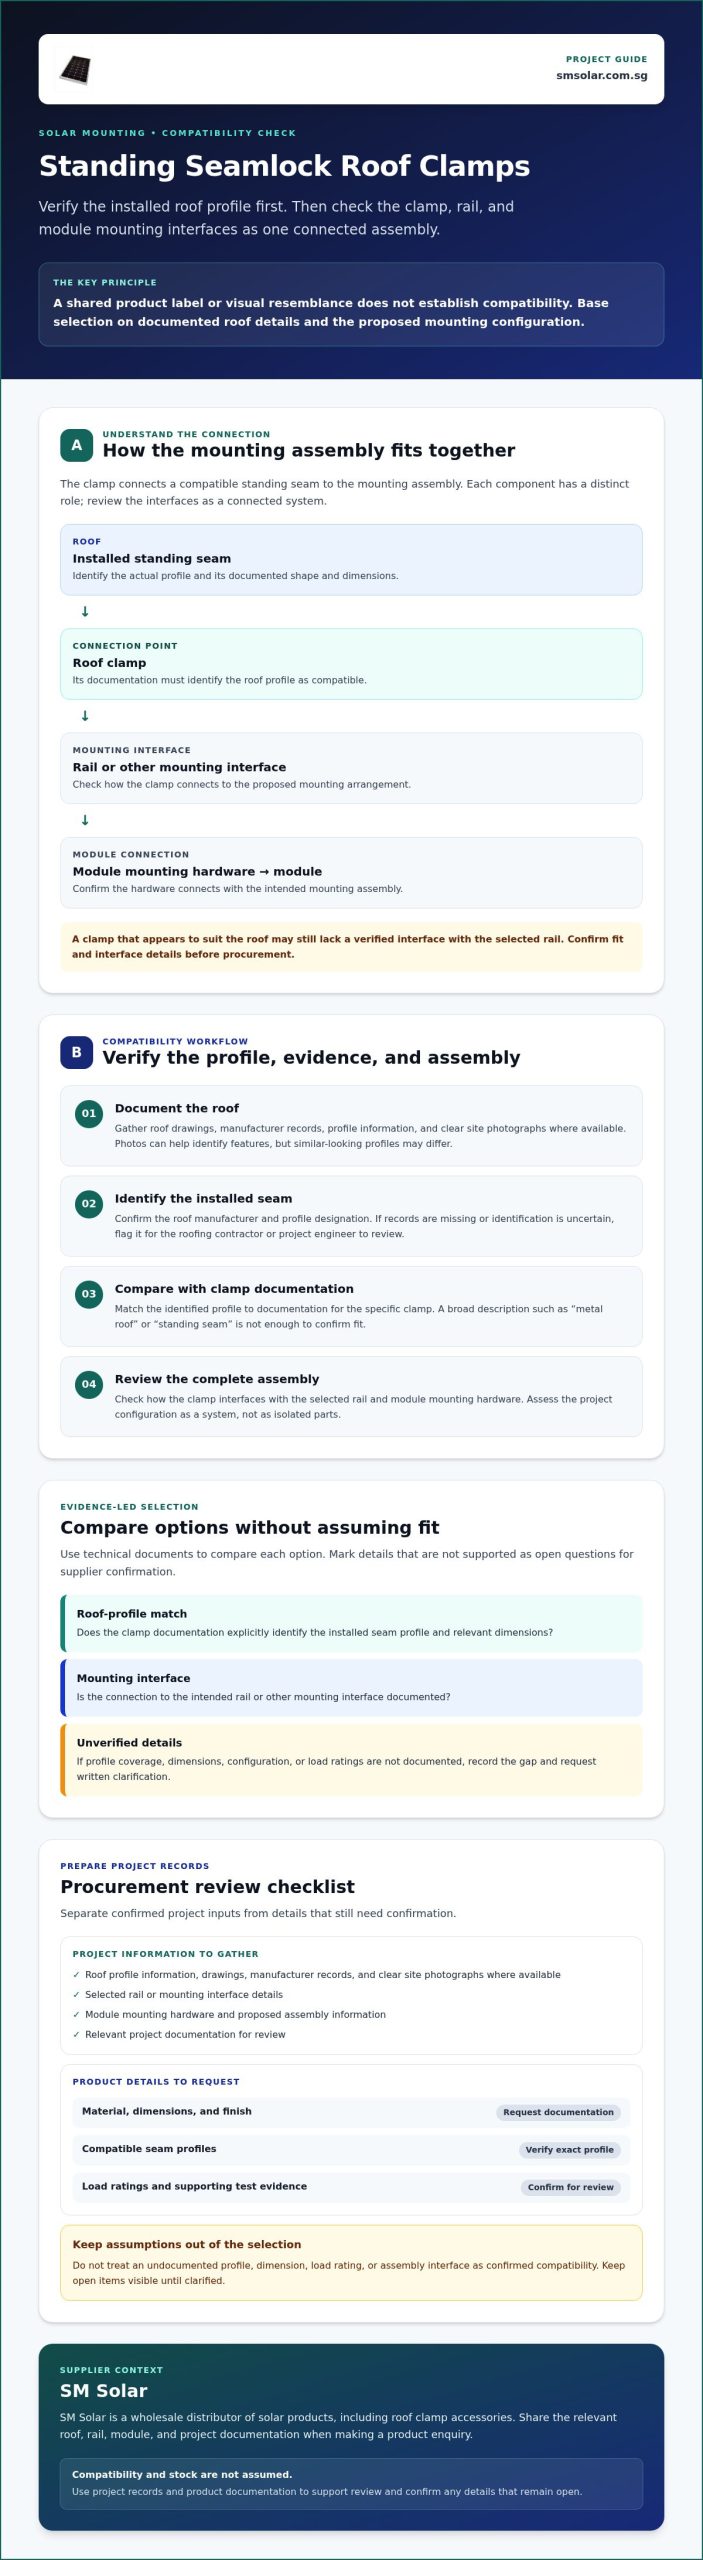
Prepare a Standing Seamlock Clamp Procurement Checklist
A complete enquiry helps the supplier assess a requested clamp against the roof and mounting design. Separate information the project team can provide from product details that still need confirmation. This keeps assumptions visible and gives the responsible designer or engineer a clear record to review before procurement approval.
Information to include in a supplier enquiry
Provide the project inputs available at the enquiry stage. Use current records where possible, and label provisional details rather than presenting them as confirmed.
- Roof: Manufacturer and profile designation, roof drawings or product documentation, and clear photographs of the installed seam. Note any profile details that remain uncertain.
- Rail and module arrangement: Proposed rail and module mounting components, with their product documentation and relevant interface details.
- Project design: Applicable design requirements and project documents that affect the mounting assembly. Use the requirements stated in the project documentation rather than assuming a generic code or specification applies.
- Enquiry request: Ask the supplier to confirm the clamp’s fit with the documented roof profile, its interfaces with the proposed mounting components, and the product documents available for review.
Details the supplier must confirm
Don’t fill information gaps with visual comparisons or category names. Request current documentation or written confirmation for the clamp identity, compatible seam profiles, dimensions, material, finish, and connection details. Ask whether load ratings, test evidence, or installation instructions are available for the specific clamp and whether they address the project configuration. Mark any detail that can’t be substantiated as unresolved.
Checks before approving an order
Before releasing the order, compare the supplier’s confirmation against the roof and mounting records. Check that the identified clamp is the one being procured, and that its documented profile fit and assembly interfaces correspond to the project. Resolve open questions about performance or installation requirements first. A product description alone isn’t a substitute for supporting documents.
- Confirm the product identity and documented roof-profile fit.
- Confirm the clamp-to-rail and rail-to-module interfaces.
- File relevant product documents and written clarifications with the project record.
- Record the responsible designer or engineer who reviews and accepts the final mounting design.
Use this checklist to prepare a project-specific enquiry for standing seamlock roof clamps from SM Solar, a wholesale solar product distributor that includes roof clamp accessories. Share the roof, rail, and project documents, then obtain product-detail confirmation before purchase approval.
Source Standing Seamlock Roof Clamps Through SM Solar
SM Solar is a wholesale distributor of solar products, including roof clamp accessories. For a project-specific enquiry, provide enough information to assess the requested standing seamlock roof clamps against the documented roof profile and intended mounting arrangement. A product category alone doesn’t confirm a particular clamp model, specification, stock status, certification, or compatibility.
What to include when requesting product information
Send the available project records with the enquiry. Clear inputs help distinguish confirmed requirements from details that still need review.
- Roof information: Confirmed manufacturer and seam-profile designation, plus relevant roof drawings, manufacturer documents, or clear photographs of the installed seam.
- Mounting arrangement: Proposed rail and module mounting components, with their product documentation and interface details.
- Project requirements: Relevant design criteria and project documents that the proposed assembly must address.
- Open technical items: List unknown dimensions, material or finish details, load ratings, test evidence, installation requirements, or profile compatibility statements.
Ask which current product documents are available for review and whether they explicitly address the submitted roof profile and mounting configuration. Request confirmation of the clamp-to-rail interface as well as the clamp-to-seam fit. If the information doesn’t establish suitability, leave the item unresolved instead of treating an assumption as an approved specification.
Confirm project support and next steps
SM Solar’s wholesale distribution role relates to product supply. Its company profile also lists system integration, installation, and after-sales maintenance capabilities for end users. Clarify the scope of the enquiry so product supply isn’t confused with those stated project services. Don’t assume that a clamp enquiry includes installation or design approval.
Before placing an order, confirm product identity, current availability, supply details, and supporting documentation directly with SM Solar. Ask for written clarification of outstanding profile, interface, or performance questions, then have the responsible designer or engineer review and accept the final mounting design. Procurement confirmation and project-design acceptance are separate checks.
To submit a project-specific request with your roof and mounting-system details, submit a standing seamlock roof clamp enquiry.
Move to Procurement With the Key Details Confirmed
Select standing seamlock roof clamps by matching documented clamp compatibility to the installed roof profile, then checking the connection to the proposed rail and module mounting hardware. A product category or visual resemblance isn’t proof of fit. Compare options using current technical documentation, and leave unsupported details unresolved until they’re confirmed.
Before approval, assemble the roof records, mounting-system information, and project requirements for supplier review. Confirm product identity, profile fit, assembly interfaces, and available performance and installation documentation. The responsible designer or engineer should review and accept the final mounting design before procurement proceeds.
SM Solar distributes solar hardware, including roof clamp accessories. Its company profile also lists system integration, installation, and after-sales maintenance capabilities for end users; clarify whether your enquiry concerns product supply or those stated services. Submit your roof and mounting details to SM Solar for a project-specific clamp enquiry.
Frequently Asked Questions
What are standing seamlock roof clamps used for?
Standing seamlock roof clamps connect a compatible raised roof seam to a solar mounting assembly. The clamp forms an interface between the roof and components such as a rail; separate module mounting hardware connects the modules to that assembly. The clamp’s role doesn’t confirm that it fits a particular roof or rail. Check the installed seam profile and product documentation, then review the complete mounting configuration for the project.
How do I know whether a roof clamp fits my standing seam profile?
Compare the roof’s documented profile with the exact compatible profiles listed in the clamp’s current technical documents. Gather the roof manufacturer and profile designation, drawings, and clear photographs where available. Visual similarity alone doesn’t confirm fit. If the profile or clamp interface isn’t clearly covered, ask the supplier for written clarification. Have the responsible designer or engineer review the documented fit as part of the proposed mounting design.
Can standing seamlock roof clamps be installed without drilling?
Whether a clamp can be installed without drilling depends on the specific clamp design, roof profile, and installation instructions. Don’t infer a non-penetrating installation method from the product category or assume all standing-seam clamps attach the same way. Review the instructions and roof-system requirements for the exact products being considered. Confirm the installation method with the supplier and relevant project professional before specifying or ordering the clamp.
What information should I provide when sourcing solar roof clamps?
Provide the known roof manufacturer and seam profile, plus roof drawings, manufacturer documents, or clear site photographs. Include the proposed rail and module mounting arrangement with their product documentation. State the project requirements relevant to the mounting assembly and identify unknowns, such as clamp dimensions or interface details. This gives the supplier a basis to review the request and identify which product details need confirmation.
Are standing seamlock roof clamps compatible with every metal roof?
No. Metal roofs use different profiles and construction details, and a clamp’s compatibility must be confirmed for the specific roof seam. A product described as a standing-seam or metal-roof clamp isn’t automatically suitable for every metal roof or standing-seam profile. Check the roof documentation against the clamp’s stated compatible profiles and interfaces. Ask the supplier to clarify any gap before procurement, and obtain project-design review.
What technical documents should I request for a roof clamp?
Request current product documentation covering clamp identity, compatible seam profiles, dimensions, material, finish, interface details, and installation requirements. Ask for load ratings, supporting test evidence, and other applicable project documents where the design requires them. Don’t assume a rating, certification, or performance claim without supporting records for the clamp under review. If documents don’t address the proposed roof and mounting configuration, request clarification before approving an order.
Can SM Solar help with standing seamlock roof clamp enquiries?
Yes. SM Solar is a wholesale distributor of solar products that includes roof clamp accessories. For a project-specific enquiry, share the roof profile information, relevant drawings or photographs, rail and module mounting details, and project documentation. Ask SM Solar which product documents are available, and confirm current availability and interface details. Distinguish product supply enquiries from the company profile’s listed end-user capabilities: system integration, installation, and after-sales maintenance.
Leave a Reply