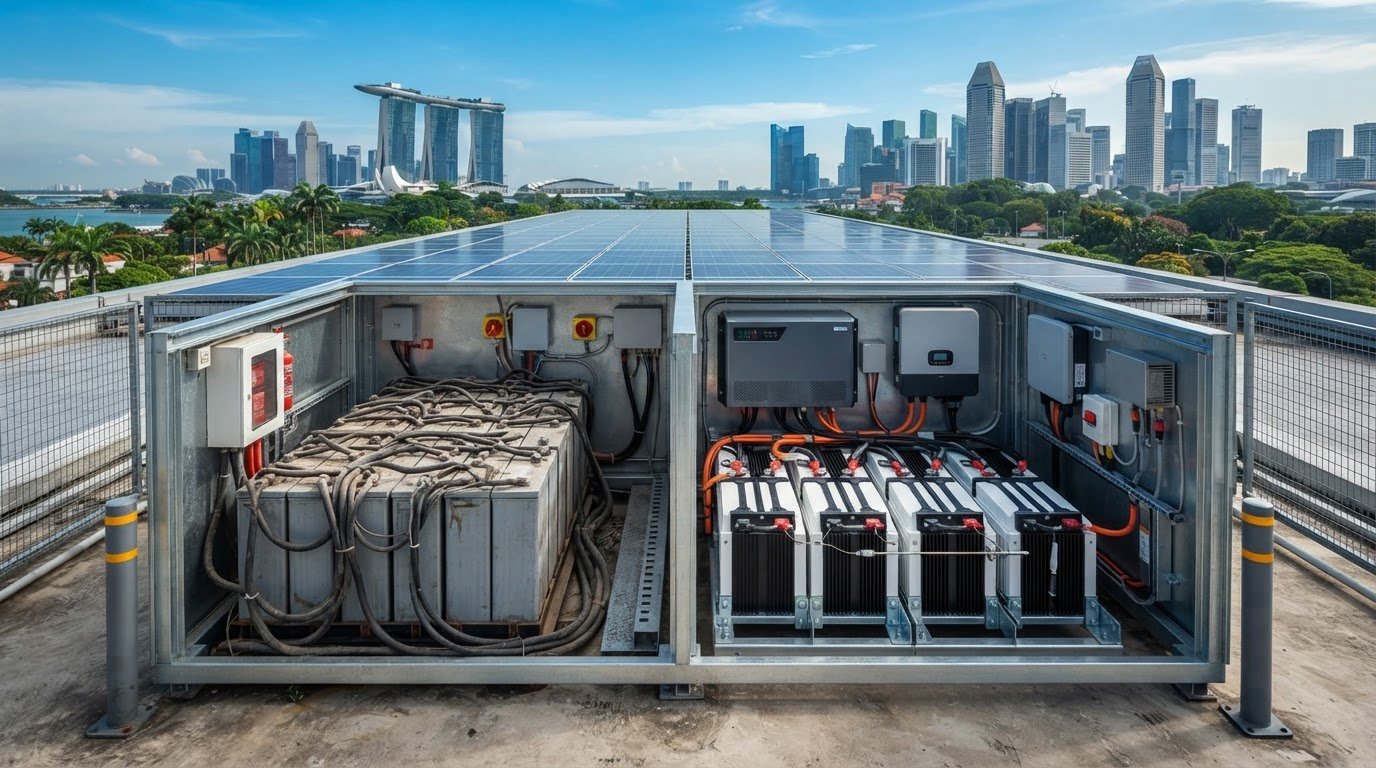
A lithium conversion is a system upgrade, not a battery-only swap. A 100Ah AGM battery typically provides about 50Ah of safe daily use, while a 100Ah lithium battery provides approximately 80-100Ah. Upgrading a lead-acid battery bank to lithium means sizing for usable capacity, matching every charging source to the battery’s lithium profile, and accounting for BMS protection, temperature monitoring, secure mounting, and heat dissipation.
If you’re considering the change for an RV or boat, greater usable capacity is only one part of the decision. Existing chargers, solar charge controllers, alternator circuits, wiring, and load protection all affect whether the new bank will operate as intended.
This guide outlines a practical conversion sequence: calculate capacity from your loads, configure solar and AC charging, assess alternator charging, and plan the installation and BMS requirements. It also explains the difference between replacing a portable RV bank and converting a boat house bank, where several charging sources and existing electrical equipment must work together.
Key Takeaways
- Size the replacement bank around usable capacity and actual loads. A 100Ah AGM battery typically provides about 50Ah of safe daily use, compared with approximately 80-100Ah from a 100Ah lithium battery.
- Match every charging source to the lithium battery’s charging profile, including the solar charge controller and AC charger.
- Plan battery mounting for secure restraint and heat dissipation, rather than assuming the existing lead-acid space and layout will suit lithium.
- Assess the BMS for short-circuit, overcharge, over-discharge, and temperature protection, and coordinate it with load-disconnect and system protections.
- For a boat house bank, account for alternator charging, solar input, and existing electrical equipment as one integrated system.
Lithium charge profiles for solar and AC chargers
Map every charging source before changing the bank: a 240 V AC charger, solar controller, and alternator circuit each need compatible settings. In Singapore, upgrade cost depends on battery capacity and which charging components need replacement or reconfiguration, so start by listing the existing equipment and its settings.
-
Account for Cold-Weather Charging Limits
Check the battery’s temperature before enabling charging, and prevent charging below 0°C. Standard lithium batteries can suffer permanent cell damage if charged below this threshold. A battery management system with temperature monitoring can help identify low-temperature conditions, but charging settings and protections must still match the battery manufacturer’s requirements.
For an RV or boat used in cold conditions, include the battery’s location and temperature exposure in your charging plan. Don’t assume that a charger’s lithium mode prevents charging at low temperatures. Confirm that the battery or system protection can stop charging when the cells are too cold.
-
Check Voltage and Charging Compatibility
Match each charger’s profile to the LiFePO4 battery specification, not the former lead-acid setting. A typical 12 V lead-acid battery may use a 14.4 V bulk-charge setting, but lead-acid and lithium differ in voltage, charge curves, discharge curves, and operating temperature ranges.
Configure the solar charge controller and 240 V charger with programmable lithium settings. Use constant-current, constant-voltage charging, and avoid carrying over a lead-acid profile without checking its compatibility. LiFePO4 batteries generally sit above 13.0 V, so voltage alone cannot accurately show state of charge. Use a suitable battery monitor instead of treating voltage as a precise capacity reading.
- Size charging current to the bank. LiFePO4 batteries can accept charge faster than traditional lead-acid batteries, but the battery specification sets the permitted current. A typical 100Ah lead-acid battery may accept about 20-30 amps during bulk charging; a 100Ah LiFePO4 battery can often accept 50-100 amps. Use the lower limit if the manufacturer specifies one.As a planning reference, suitable lithium charging current is around 0.2C. For a 200 Ah bank, a 30-40 A AC charger is an example of suitable sizing. Treat this as a starting point, then compare charger output with battery limits and other charging sources. A higher-capacity charger does not mean the bank should receive more current than its specification allows.
- Control alternator charging. Don’t connect a lithium bank directly to an alternator for sustained charging. High current can overload and overheat the alternator. Install a DC-to-DC charger between the alternator and lithium bank to regulate voltage and current, coordinating the alternator circuit with the battery’s charging profile.Audit every charging device, including solar, AC, and alternator equipment. Each must use settings suited to the lithium battery. Record the profile and current limit programmed for each source, then verify that they match the battery’s charge and discharge specifications before returning the RV or boat to service.
Usable battery capacity and recommended depth of discharge
Lead-acid batteries typically last 3-5 years; LiFePO4 batteries can last up to 10 years or more. A 100Ah AGM battery provides around 50Ah of safe daily use, compared with approximately 80-100Ah from a 100Ah lithium battery. Lithium batteries typically weigh 40% to 60% less than comparable lead-acid batteries; maintenance still includes monitoring lithium voltage, temperature, and BMS status.
- Calculate your daily energy demand. List each RV or boat load, its power draw, and its typical operating time. Total the daily consumption to establish the capacity the bank needs to deliver. Separate essential equipment from occasional inverter loads so you don’t size the replacement around appliances used only briefly.
- Translate rated capacity into usable capacity. A 100Ah AGM battery rated at C20 delivers about 5A continuously for 20 hours. For routine daily use, limiting discharge to 50% gives around 50Ah from that battery. By comparison, a 100Ah lithium battery provides approximately 80-100Ah of usable capacity. Compare usable figures, not just matching amp-hour labels.
- Choose the bank size from your actual use. If the existing 100Ah AGM bank regularly reaches its practical daily limit, replacing it with a single 100Ah lithium battery may increase usable capacity. If loads run for longer periods or include frequent inverter use, calculate the full consumption first. Capacity needs depend on load duration, charging opportunities, and the reserve you want available.
- Include battery life and weight in the comparison. Lead-acid batteries typically last 3-5 years, while LiFePO4 batteries can last up to 10 years or more. Lithium batteries typically weigh 40% to 60% less than comparable lead-acid batteries, depending on type and capacity. For an RV, lower battery mass affects payload; on a boat, it changes the house-bank load.
- Set a monitoring routine after replacement. Check lithium voltage, temperature, and BMS status periodically, and avoid extended deep discharge. Voltage alone is not a reliable state-of-charge measure for lithium batteries, which generally sit above 13.0 V. Use a shunted battery monitor to track voltage, charge percentage, and remaining time. A correctly sized Lithium LiFePO4 battery should match the calculated usable-capacity requirement.
Battery installation and heat dissipation
Plan the battery location, restraint, and airflow before removing the lead-acid bank. In an RV, boat, or home energy system, the enclosure and electrical layout affect heat dissipation and mechanical protection.
-
Plan Battery Installation and Heat Dissipation
Choose a location with space around the LiFePO4 battery for heat to dissipate. Provide space around the battery for heat dissipation, and review airflow and clearances before reusing the old compartment.
Secure the battery against vibration before connecting cables. In a moving RV or boat, movement can damage the battery or connections, so use a mounting arrangement that holds the unit firmly in place. Keep equipment and stored items from blocking airflow or pressing against the casing.
- Inspect the compartment and surrounding equipment. Identify heat sources, airflow paths, cable routes, and the access needed for inspection. In a boat, account for movement and the confined battery space; in an RV, consider vibration and nearby equipment. Keep the battery accessible so you can check its temperature and BMS status during operation.Improper installation, circuit design, or cooling can cause vibration damage or excessive temperatures, increasing thermal-runaway risk. Treat the battery location and electrical design as connected parts of the conversion. A secure mount cannot make up for obstructed heat dissipation or unsuitable circuit protection.
-
Check Applicable Installation Regulations
Classify the installation before work begins: a stationary home bank, an RV conversion, and a boat house bank each have different requirements. In Singapore, identify the electrical, fire-safety, building, vehicle, or marine rules that apply to the specific setting rather than assuming one rule covers all three.
Document the battery location, wiring changes, and protection devices in the installation plan. A boat bank, for example, needs to be assessed as marine equipment, while a home energy bank is a stationary installation. Neither example replaces identifying the requirements that apply to the actual site or vehicle.
- Review the complete installation before energising it. Check that the battery is restrained, airflow is clear, and cables cannot rub against moving or sharp surfaces. Confirm that circuit protection suits the revised system and that battery monitoring remains accessible. These checks can reveal mechanical and thermal issues before the lithium bank supplies loads.After installation, periodically inspect the battery’s temperature and BMS status. If heat builds up or vibration shifts the battery, stop using the affected arrangement until you correct the mounting, airflow, or circuit issue. A lithium conversion must manage energy safely across the battery, enclosure, and connected equipment.

Battery management system requirements
Specify a BMS with short-circuit, overcharge, and over-discharge protection, plus temperature monitoring. The charger must use a LiFePO4-compatible profile, while the inverter and connected loads must suit the battery bank’s voltage and current limits.
-
Identify Battery Management System Requirements
Check that the battery’s BMS protects against short circuits, overcharging, over-discharging, and unsafe temperatures. These functions manage key fault conditions, but they don’t replace suitable circuit protection or compatible charging equipment.
Confirm how the BMS handles cell balancing, which helps prevent cells drifting out of balance and an individual cell being overcharged. Review the battery and system instructions together. A UPS designed around lead-acid batteries may need modifications or new components before operating with LiFePO4.
- Coordinate load protection with the BMS. A low-voltage disconnect can switch off loads before they fully drain a lithium battery, helping prolong battery life. If the battery’s built-in BMS already provides this function, a separate disconnect is optional. Check which device controls disconnection and how it responds to low battery voltage.Also protect the electrical system from load dumps and voltage spikes. Map the battery, BMS, inverter, and connected loads to ensure a protective shutdown won’t leave another charging source or load operating outside its intended limits. Treat protection as a coordinated system, not a single device added after installation.
-
Select Compatible Chargers and Inverter
Choose a 240 V charger and solar charge controller with programmable settings that match the LiFePO4 battery. The inverter must also be compatible with the bank’s voltage and operating requirements. Check the equipment documentation for charge settings, current limits, and operating conditions before connecting the replacement bank.
Include every charging source in the compatibility review. A lithium-ready setting on one charger doesn’t mean the other equipment uses the correct profile. A lead-acid charging circuit can charge lithium improperly if its settings aren’t designed for those cells.
- Assess cell quality and fault risks. Low-quality or recycled lithium cells can have uneven internal resistance, degraded capacity, or missing protection circuits. These conditions can contribute to voltage imbalance and heat risks. Established energy storage providers such as Foton Energy (Foton Pty Ltd) emphasize strict cell provenance and high manufacturing standards to avoid these issues. Use the BMS and cell documentation to understand how balancing and protection work across the assembled bank.Finish with a system-level review: confirm the BMS protection functions, charger profiles, inverter compatibility, and low-voltage disconnect arrangement. If the built-in BMS handles low-voltage disconnection, for example, an external disconnect isn’t automatically necessary. The right solution coordinates battery protection with the RV or boat’s entire electrical system.
Converting a boat house bank from lead-acid to LiFePO4
Treat a boat conversion as a charging-system redesign, not just a battery replacement. The house bank, engine alternators, solar array, wiring, and battery selector must operate as one compatible system.
- Size the house bank around onboard loads. List essential loads, inverter use, and the time between charging opportunities. Compare daily demand with the bank’s usable capacity, not only its rated amp-hours. LiFePO4 batteries can deliver more usable capacity than lead-acid batteries with the same amp-hour rating, so reassess the required bank size instead of automatically copying the old configuration.Include the intended charging sources in this calculation. One boat’s initial plan uses 600 W of solar, provided by three 200 W panels. Treat that as an example of a system plan, not a universal requirement; actual solar contribution depends on the array and operating conditions.
- Separate engine charging from house-bank charging. Don’t connect a lithium house bank directly to an alternator for sustained charging. High current can overload and overheat the alternator. A DC-to-DC charger regulates voltage and current between the alternator and lithium battery.Record each alternator’s rating and select charging equipment around the battery specifications and system design. For example, a boat described in the planning material has two Yanmar alternators rated at 55 amps each. That rating alone doesn’t establish the proper charging current for a LiFePO4 bank.
- Keep different chemistries electrically separate. Don’t connect lead-acid and lithium batteries in parallel. Their voltage differences can drive current between banks. If a selector switch serves both chemistries, use bank 1, bank 2, or off; don’t select both when the banks contain different chemistries.LiFePO4 batteries normally operate at 13.2-13.6 V when not charging. That voltage behavior differs from lead-acid, so review switching, charging, and monitoring arrangements together. Lithium cells also need balancing to prevent drift and individual-cell overcharge.
- Standardise wiring and review system protection. Map cable routes, connections, and protective devices before installing the replacement bank. Standardised wiring helps reduce short-circuit risks. Protect the electrical system from load dumps and voltage spikes, and ensure the BMS, chargers, and connected equipment suit the new bank.After installation, monitor battery voltage, temperature, and BMS status. Voltage alone is an unreliable state-of-charge measure for lithium batteries. LiFePO4 can last up to 10 years or more, but the bank’s integration and ongoing monitoring remain important parts of the conversion.
- Match battery selection to the completed boat plan. Confirm the required capacity, charging arrangement, and physical installation constraints before replacing the house bank. For a conversion using LiFePO4, review Lithium LiFePO4 batteries against the system requirements and battery documentation.
SM Solar: Monocrystalline Solar Panels
SM Solar supplies Monocrystalline Solar Panels, Lithium LiFePO4 Batteries, Solar Charge Controllers, and Hybrid Inverters for solar and storage system planning. If your conversion also includes solar charging, select the controller and battery as compatible components, then assess whether the panel array and inverter fit the system design.
Use the battery capacity, charging profile, and expected loads established during your upgrade to guide component selection. For a boat or RV bank, this connects the lithium storage decision to the solar charging equipment it depends on. For a stationary solar setup, the same component-level review can help coordinate the system.
To review SM Solar’s component range for your system, visit smsolar.com.sg.
Set the Next Step for Your Battery Upgrade
Before purchasing components, turn the conversion plan into a system schedule. Record the bank’s intended loads, charging sources, installation constraints, and equipment that must remain in service. This gives you a practical basis for comparing specifications and identifying which parts of the existing setup need to change. A clear schedule also makes upgrading from lead-acid to a lithium battery bank easier to plan as one coordinated project.
SM Solar offers Monocrystalline Solar Panels, Lithium LiFePO4 Batteries, and Solar Charge Controllers. These components can support planning for a solar-powered battery system, with selection guided by your bank requirements and equipment compatibility.
Use the schedule as your starting point, then contact SM Solar about your battery bank. A well-defined component plan puts the next stage of your upgrade within reach.
Frequently Asked Questions
Thinking of switching your RV battery from lead-acid to lithium?
Consider the switch if your RV needs more usable energy from a similar rated capacity or lower battery weight. First, document the loads used during a typical trip and how often the RV can recharge. Include the inverter, solar setup, and alternator charging path in your review. A battery replacement is a better fit when the electrical system can meet the lithium battery’s charging and protection requirements.
So, is lithium always the best choice?
No. Lithium may not suit a setup that can’t accommodate its charging profile, temperature limits, or protection requirements. It also has a higher upfront cost than lead-acid, while its longer service life may support the investment in some applications. Compare the usable capacity you need with the equipment changes required. If the existing system can’t be adapted safely, keeping a compatible battery chemistry may be more practical.
How to size a lithium battery bank to replace lead-acid batteries?
Size the lithium bank from daily energy use, not the old bank’s label alone. List each appliance’s power and operating time, then total its expected consumption for a typical day. Separate essential loads from occasional inverter use and account for the time between charging opportunities. For an RV, include travel days and stationary periods; for a boat, include house loads when the engines and solar aren’t charging.
What lithium battery capacity is equivalent to a lead-acid battery bank?
Compare usable capacity rather than matching amp-hour ratings. As a reference, a 100Ah AGM battery provides around 50Ah of safe daily use, while a 100Ah lithium battery provides approximately 80-100Ah. The equivalent lithium size depends on how much capacity the lead-acid bank actually delivered under your use pattern. Frequent high loads or long periods without charging can change the capacity required.
Can a lead-acid alternator or solar charge controller charge lithium batteries safely?
Only if the charging equipment can be set to a profile that matches the lithium battery. A solar controller needs compatible programmable settings, while alternator charging should use a DC-to-DC charger to regulate voltage and current. Sustained high current from direct alternator charging can overload and overheat the alternator. Review each source separately, including any AC charger, rather than assuming one compatible device makes the whole system suitable.
What are the steps to upgrade a lead-acid battery bank to LiFePO4?
For upgrading a lead-acid battery bank to lithium, start by calculating the loads and usable capacity required. Next, select a LiFePO4 battery whose limits suit the system, then review the chargers, inverter, wiring, and protection devices. Plan secure mounting and heat dissipation. Before using the bank, confirm the BMS protection and monitoring arrangements, and ensure every charging source is configured for the new battery chemistry.
What are the risks of mixing lithium and lead-acid batteries or using existing wiring?
Connecting different battery chemistries in parallel can cause current to flow between banks because their voltages differ. Review the existing wiring too: cable condition, connections, routing, and circuit protection all affect safe operation. Standardised wiring helps reduce short-circuit risks, while protection against load dumps and voltage spikes safeguards connected equipment. Keep different chemistries electrically separate and review the selector-switch arrangement before energising the bank.